Table of contents
I have been learning Javascript for a few weeks and even though I still struggle with it, I'm having so much fun building webpages using it. I'm starting to get the hang of it so I decided to test out my progress in js and also Tailwindcss, I've been studying tailwindcss for a few days now, still a bit new to it. I built a Password Generator using both technologies stated above.
Prerequisites:
The Password Generator will be built using Tailwindcss and JavaScript, you don't need to know anything about them, I will walk you through it, but having previous knowledge is an advantage.
- All you need is a code editor and install nodejs from the official websites, it's needed to install tailwindcss.
- You will need to setup tailwindcss to start working with it. You can find tailwindcss instalation setup in the official tailwindcss documentation.
- I'm using icons from font awsome, you can copy the following link and add it to your html file to get the same icons I'm using in this article.
<link
      rel="stylesheet"  href="https://cdnjs.cloudflare.com/ajax/libs/
font-awesome/4.7.0/css/font-awesome.min.css"
    />
HTML + Tailwindcss:
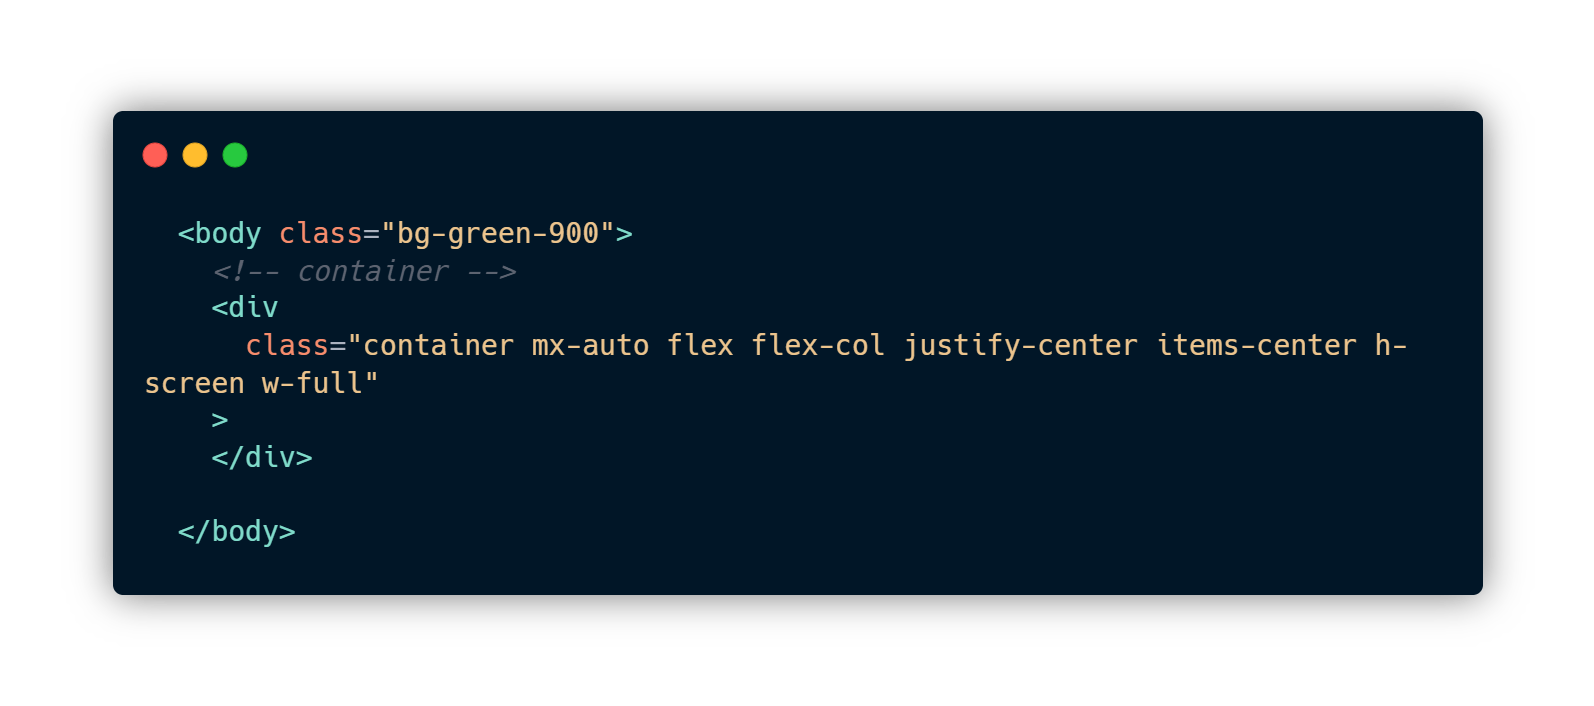
1. Set the body color and create a container:
- I started off by setting the background color of the
<body>to green-900, there are more other shades of green you can try out, then I created adivthat contains all the elements in the page. To style elements using tailwindcss, there's a set of classes that can be added to get an output. I prefer using the flex display since I'm more comfortable using it. More classes can be found in the tailwindcss documentation.
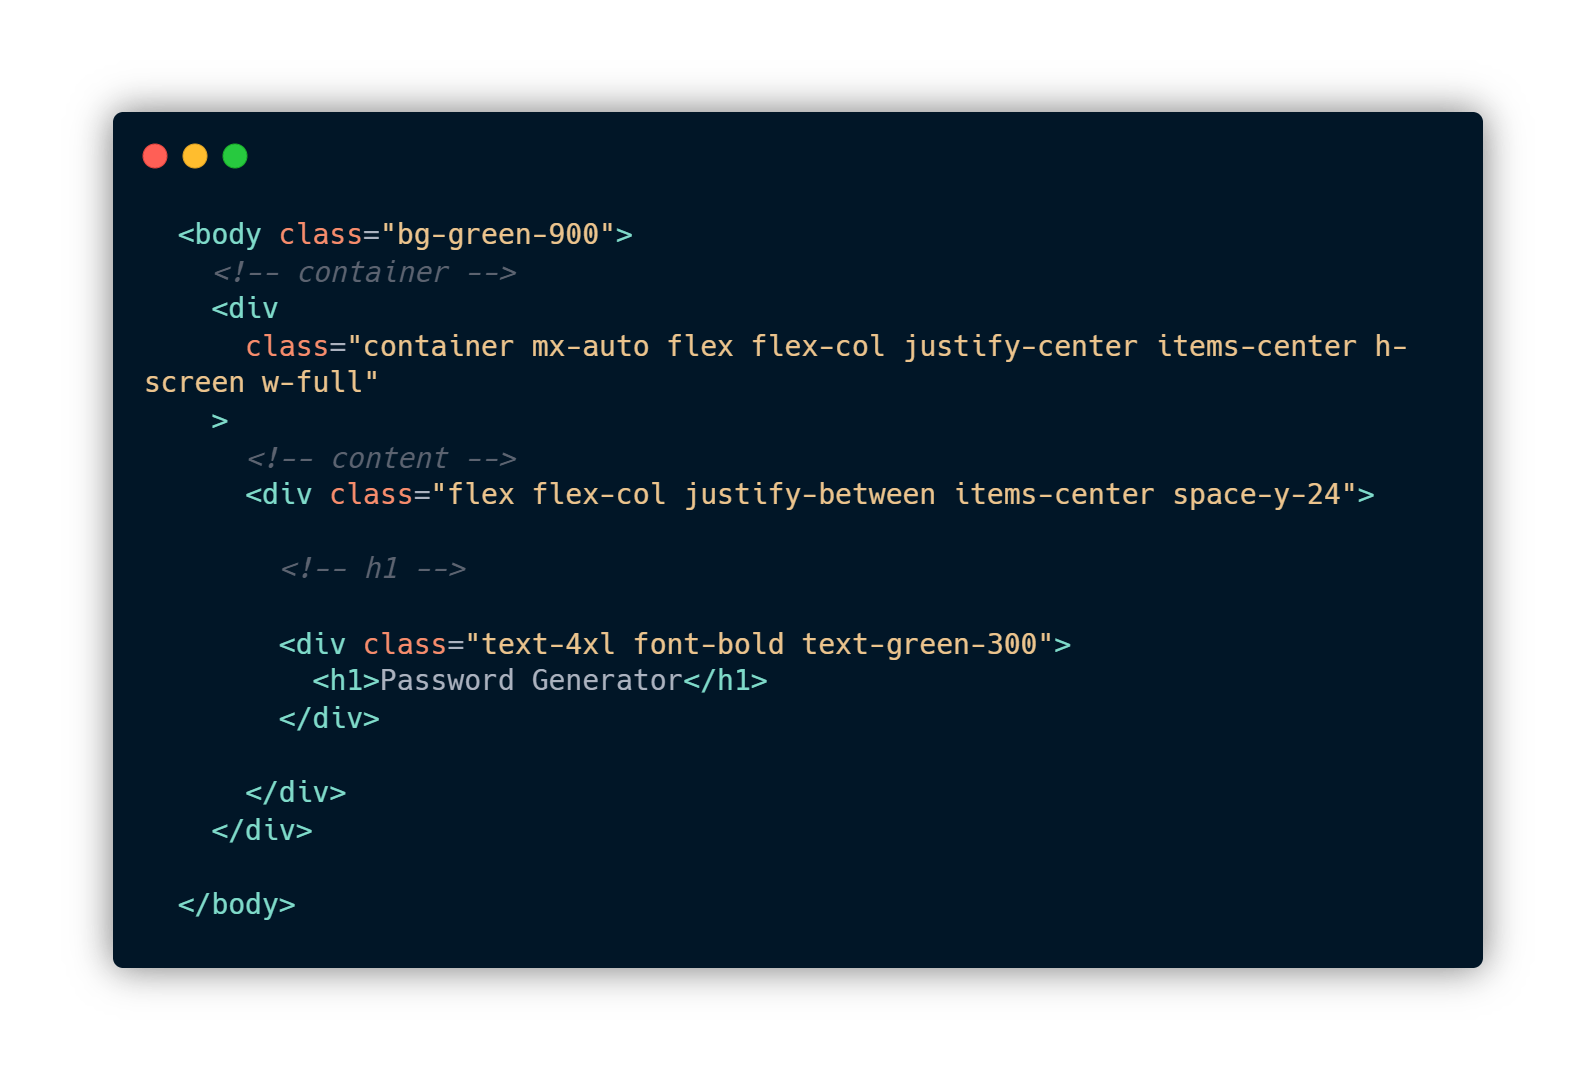
2. Adding the content div and a header:
- I created another div that will contain all the content which will be displayed in the page. Inside, I set a div that includes the main header, the classes inside will give you the same style result that's shown bellow. Note: space-x is used to add axis margin between the elements inside the div, it's pretty handy.
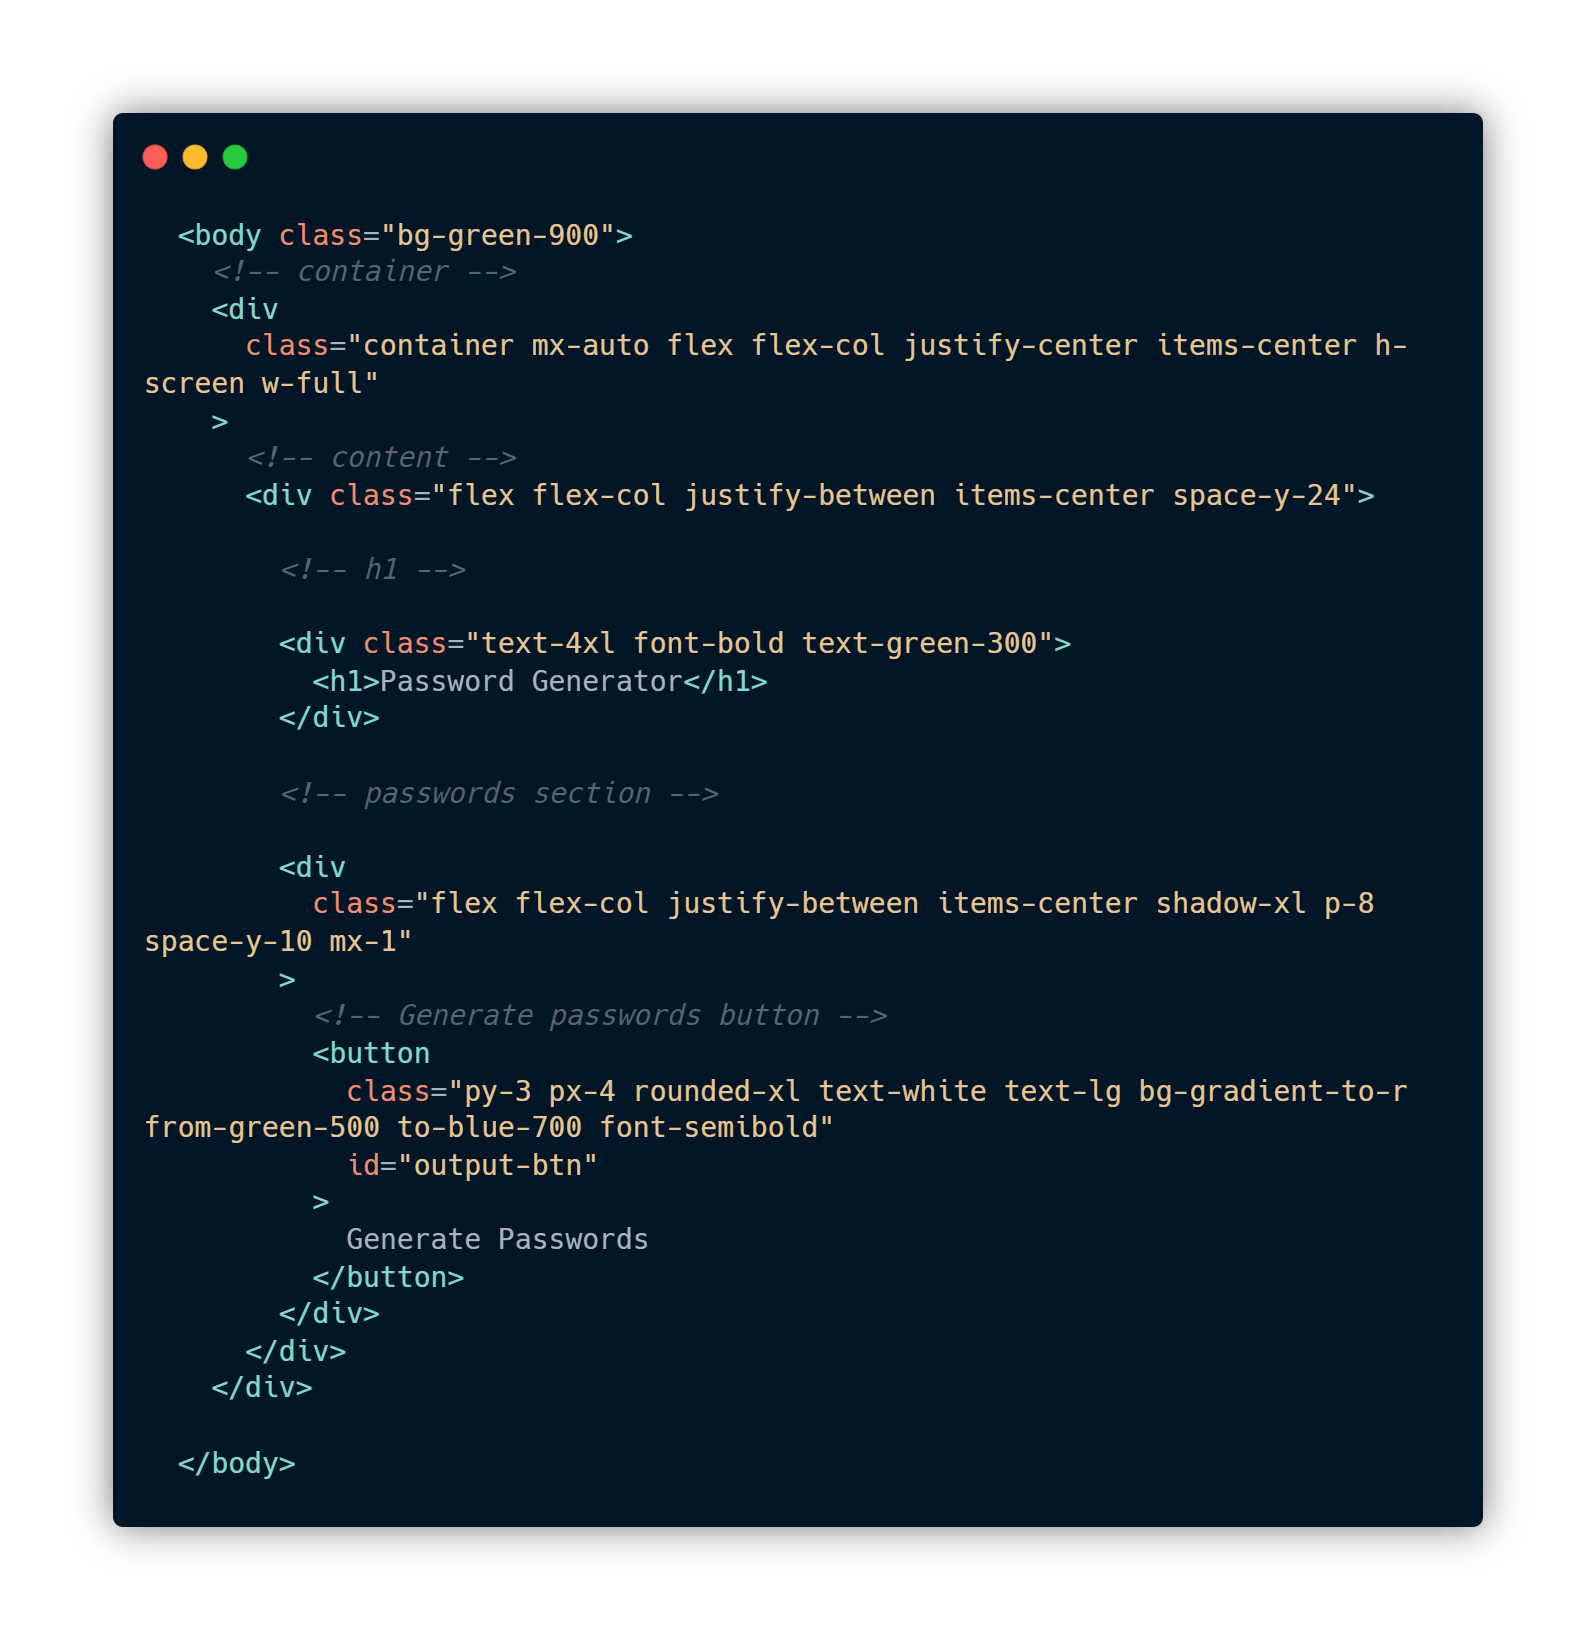
3. Passwords section:
We need a section for our passwords to be generated, I made another
divand I used the shadow class to set a shadow for the box that contains the passwords. Type the class.It's time to create the first button! I was still learning more about colors so I used a gradient color and it works! I also discovered then that there are different font weights, so I used the
font-semiboldclass, and it looked pretty good, make sure you add theid, we will need it in JavaScript.
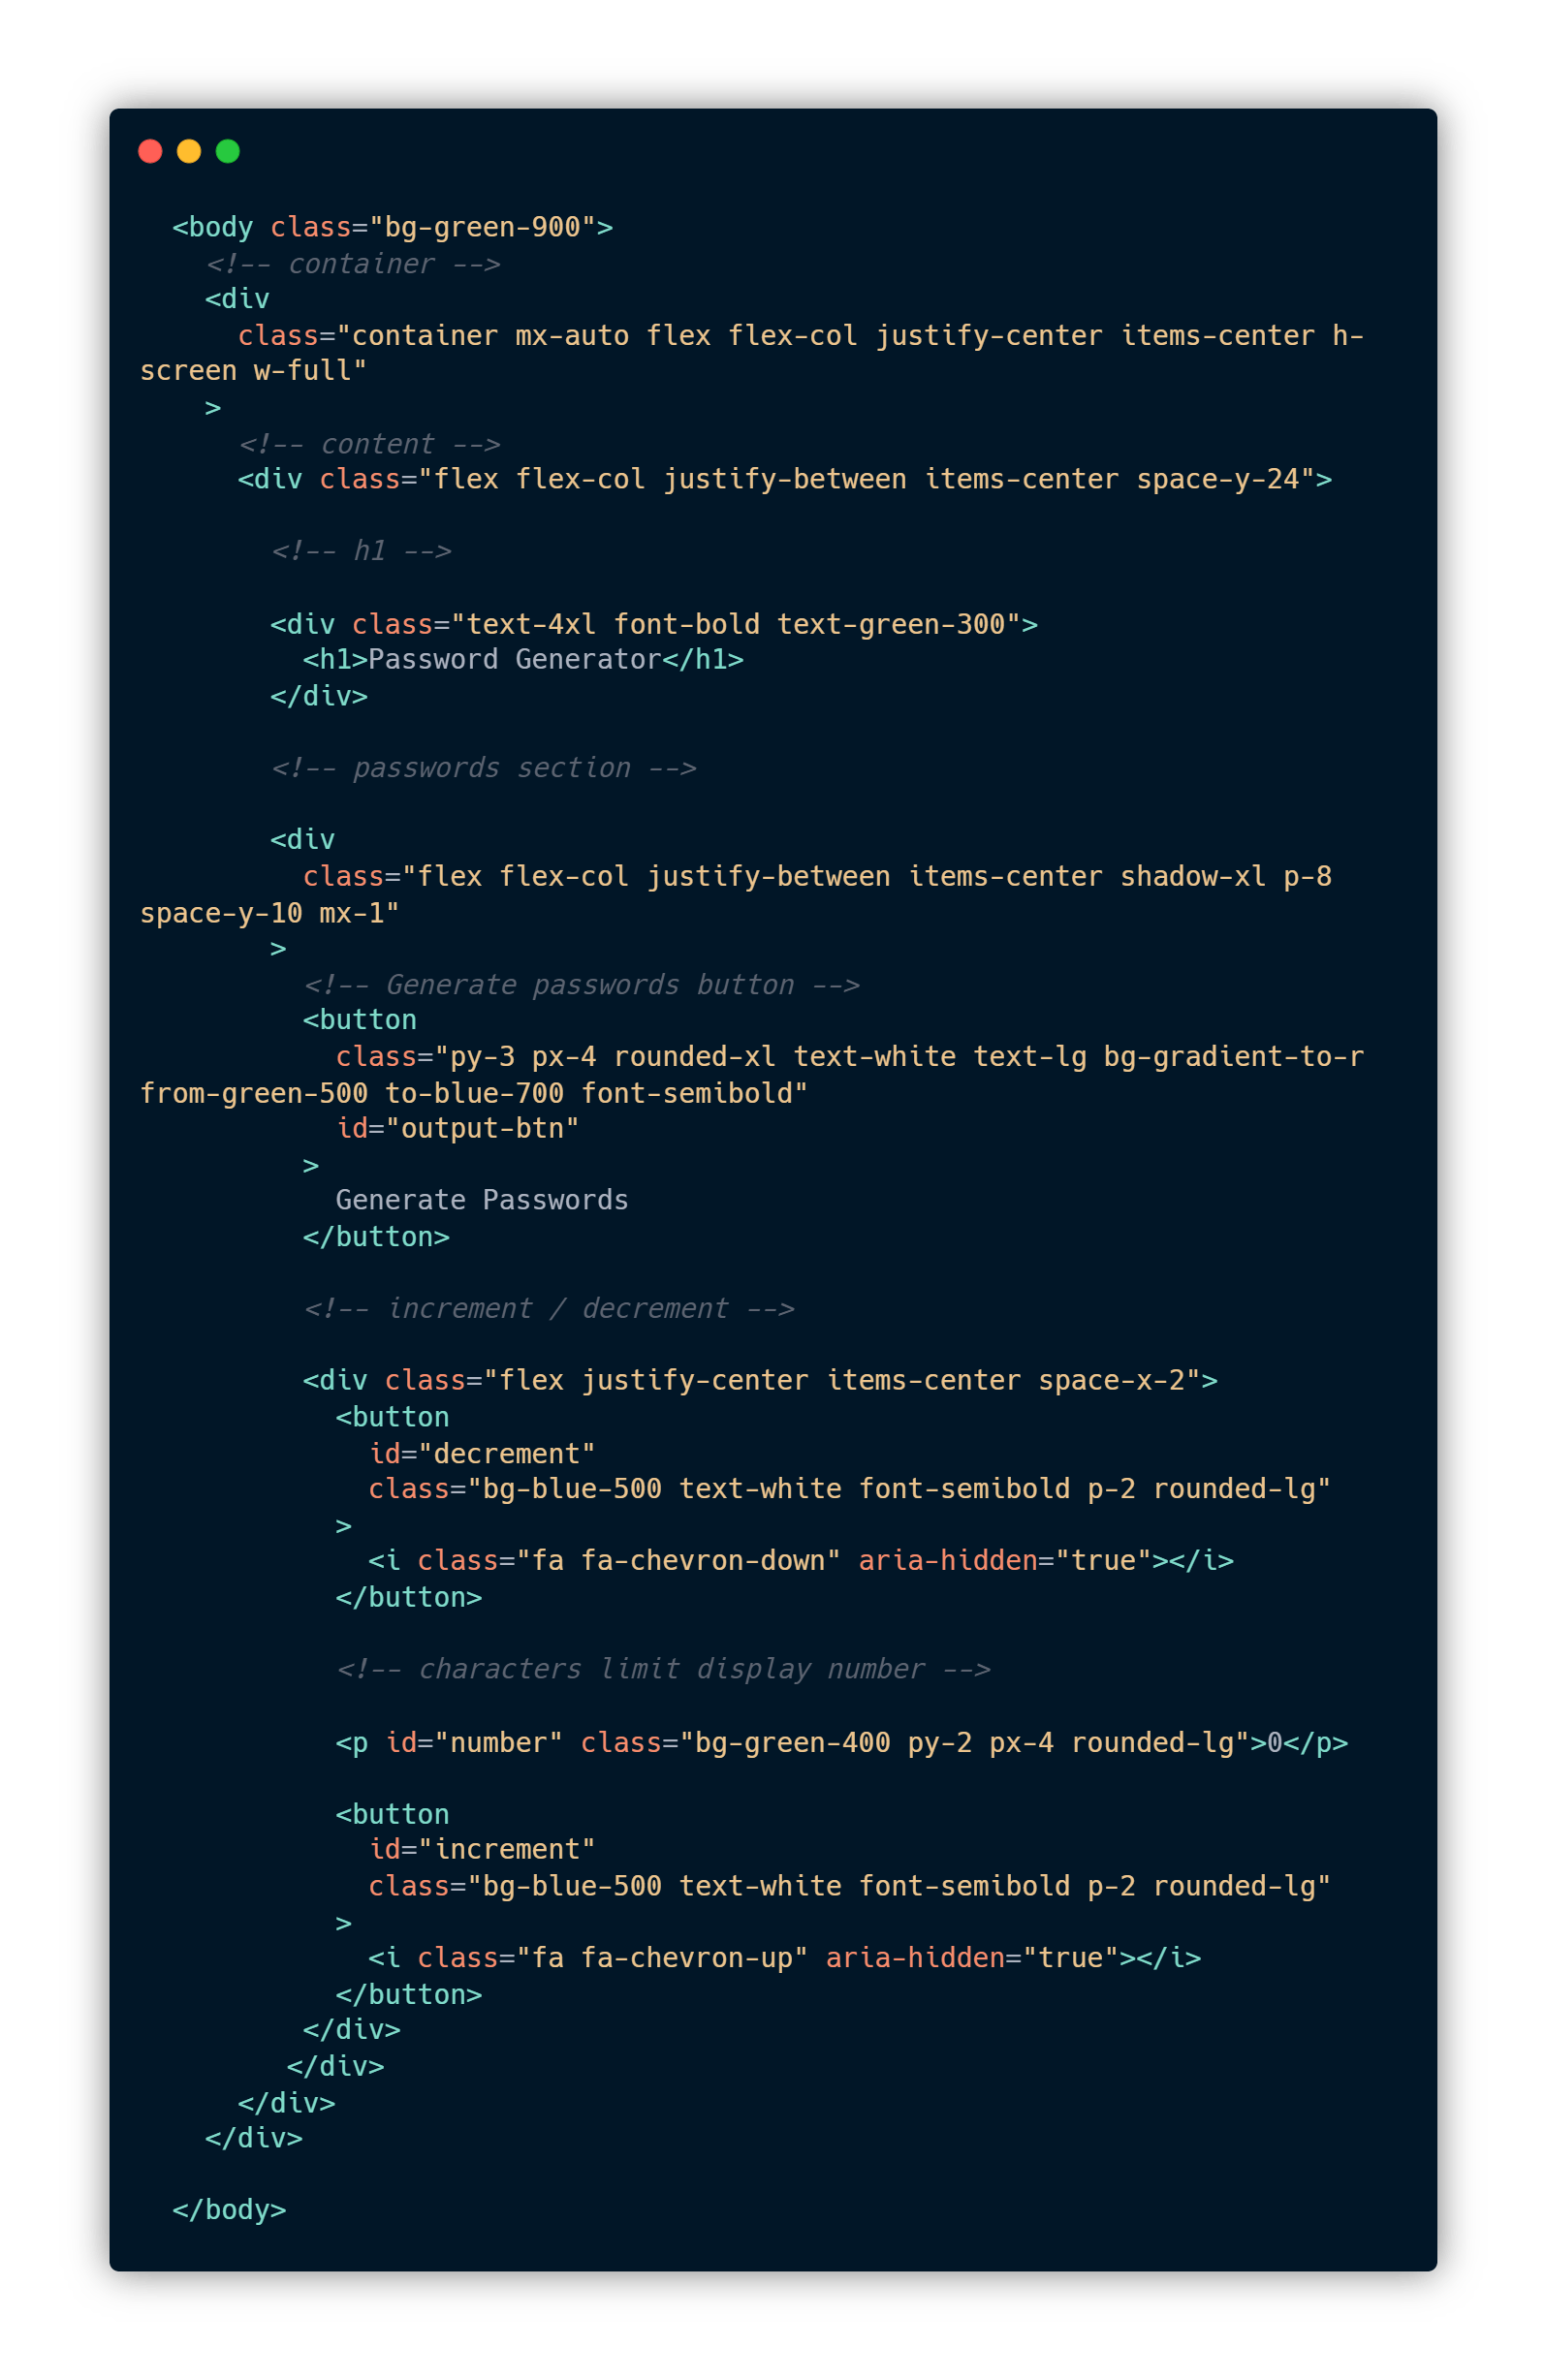
4. Increment / Decrement characters:
- I added a feature where the user can choose the number of characters that the Password Generator will display, it will need JavaScript to work, for now I created a
divwith two buttons and an empty paragraph element to display the output.
5. Output section:
- After that, I built the section where the Passwords will be displayed, I used the
inputelement for this one since I don't use it that often, make sure you set the input todisabledorreadonlyso the user can't interact with it. -Don't forget the id-. I decided to add a copy feature where the user can copy the password by clicking the copy button.
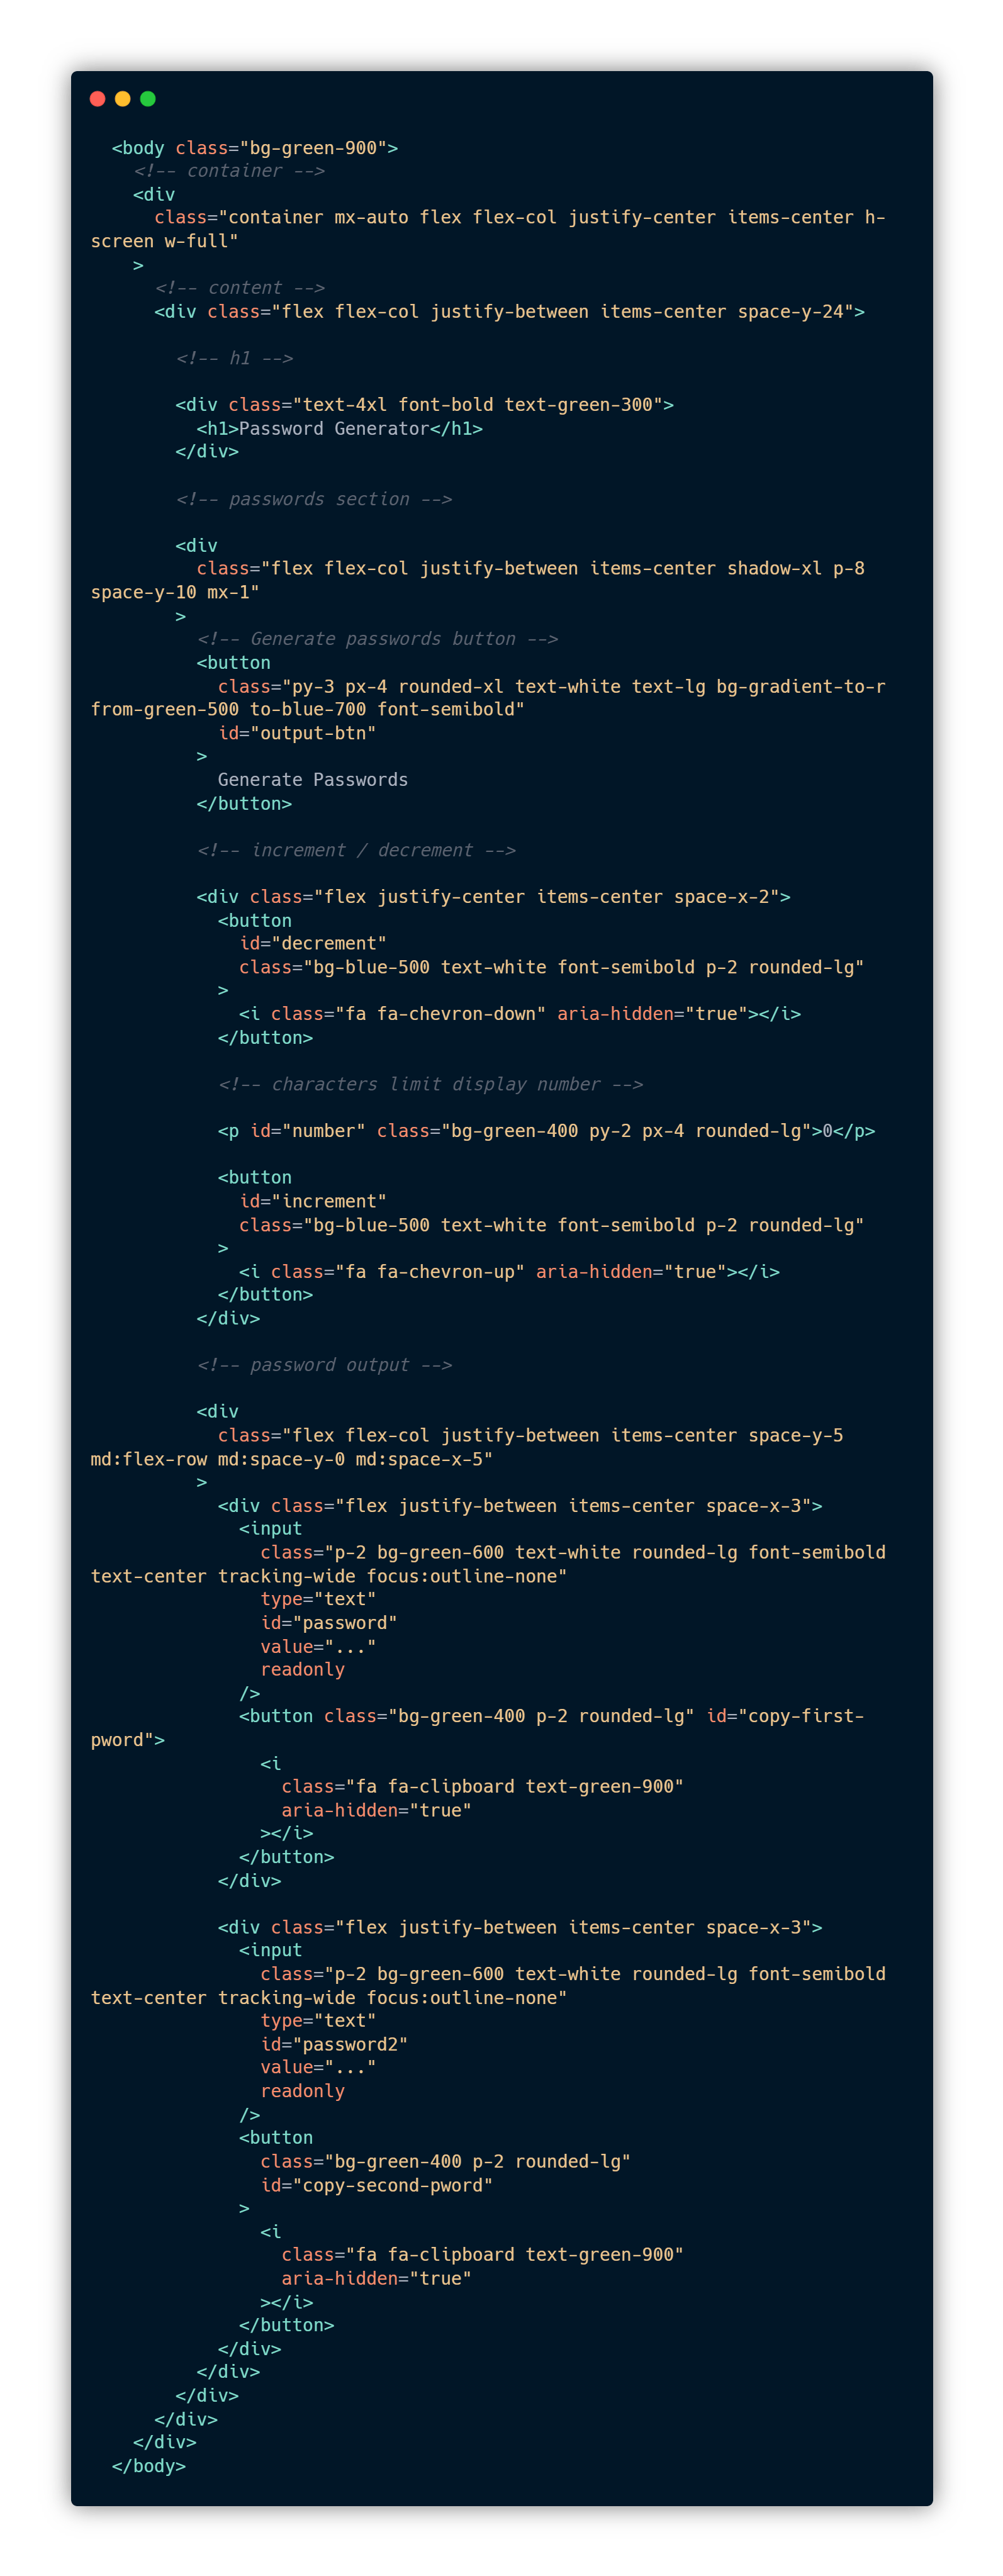
- Once this is done, we can now start adding JavaScript.
Adding JavaScript:
- You can create a javascript file or just write down your script inside the script element in html, it won't matter, it will give the same result. I created a JavaScript file and called it
script.js, make sure you link it to the html file.
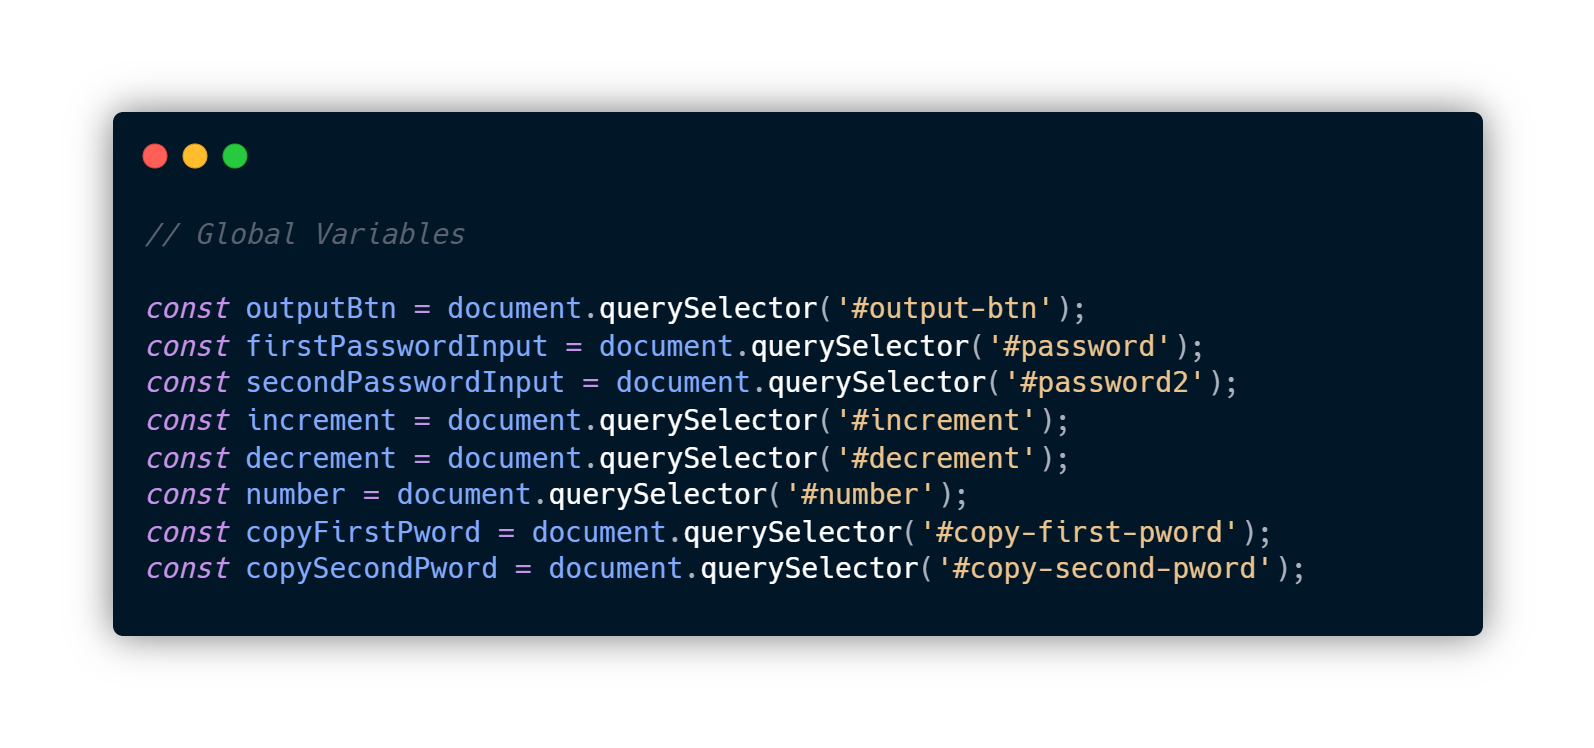
1. Set variable for the needed elements:
- Set variables for the needed elements so we can finally generate passwords. I used the
querySelectoryou can also usegetElementById
2. Create an increment and decrement Functions:
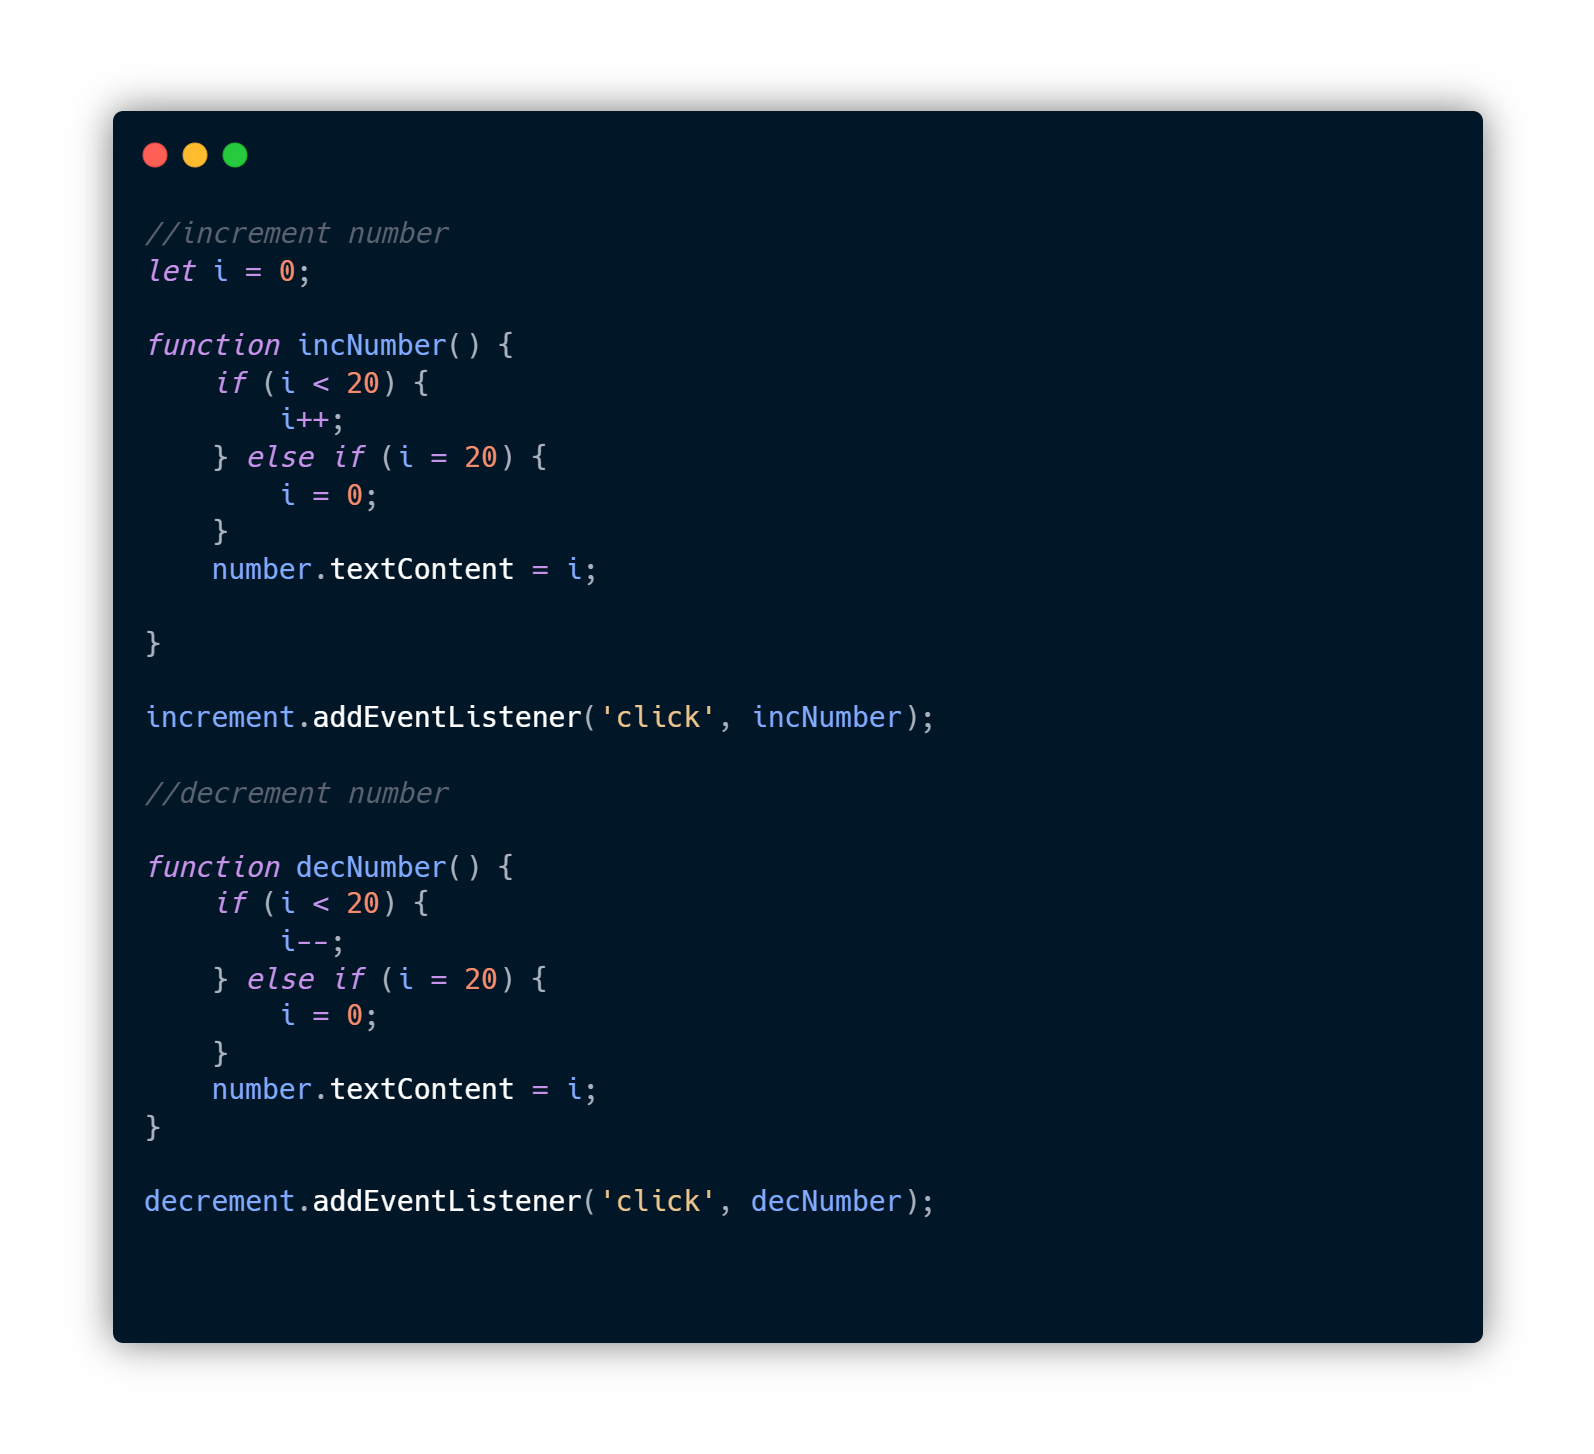
I created two functions;
incNumber()anddecNumber(). these function will allow us to set a character limit, setting the variableito 0 will allow us to initialize the count from 0 to any prefered limit, I set the limit to 20 here. we need this to be displayed on the paragraph element that we set for the numbers, to do so, just make thenumber.textContent / number.innerHTMLequal toi.Once this is done, I added a click event listener to the
incrementanddecrementbuttons, when the user clicks on the increment button, the number goes from 0 to 20 and vice versa.
3. Generate the passwords:
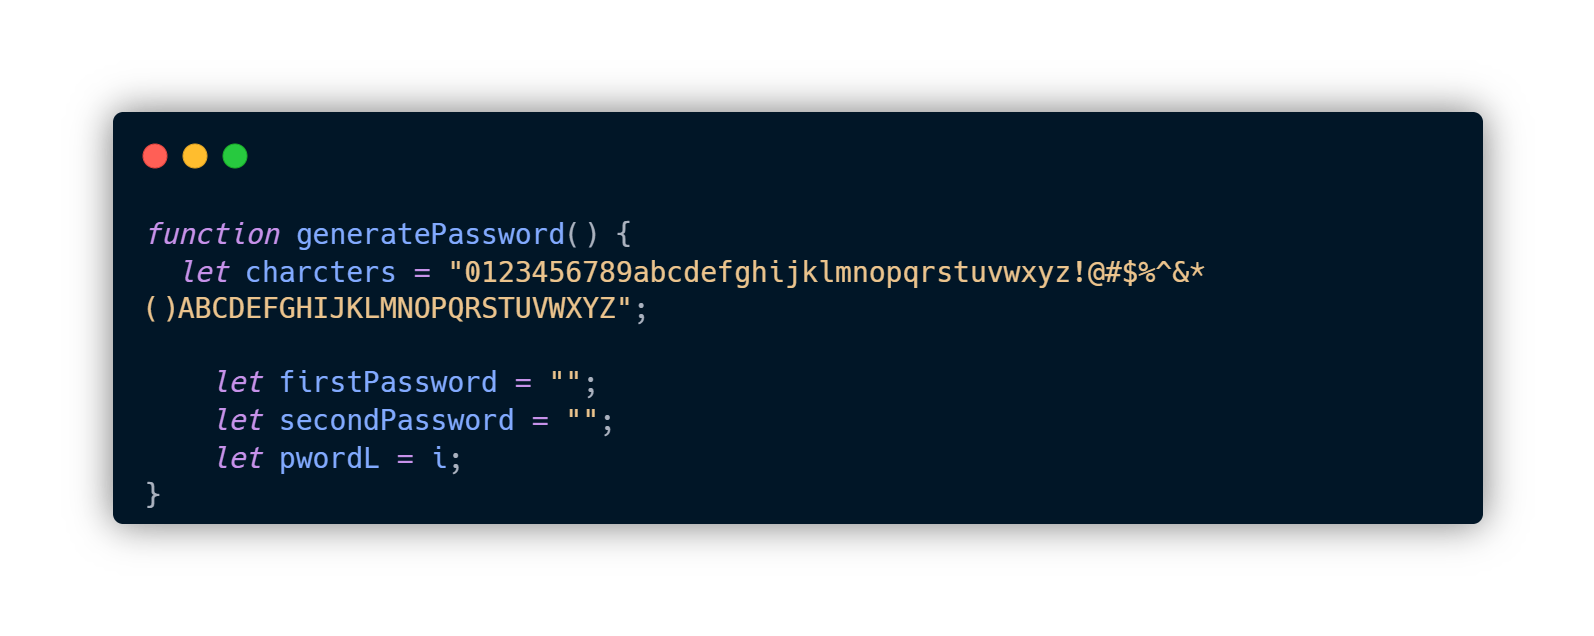
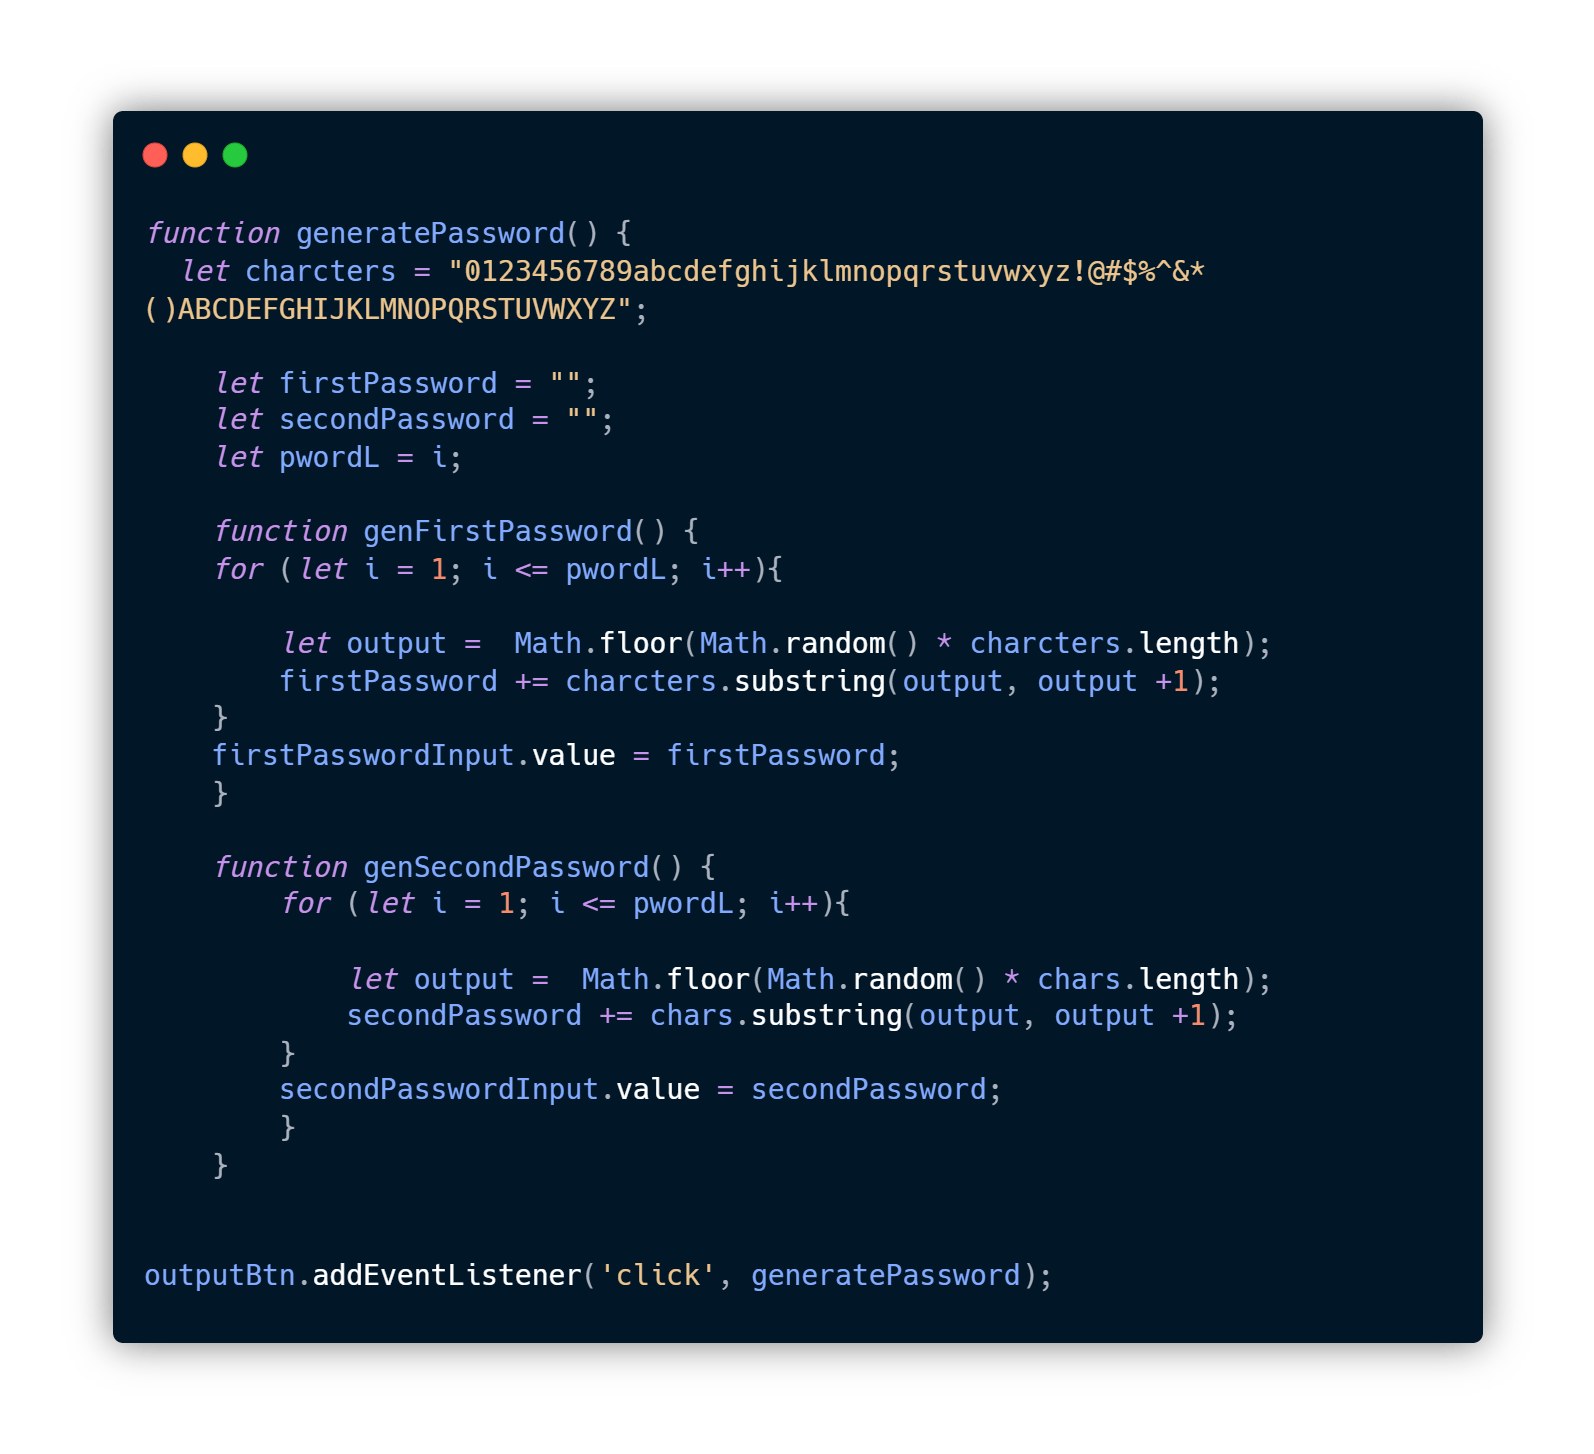
- I created a function
generatePassword(), I added all the characters, numbers and symbols that I will use to generate a random password in one variable. - I set a variable for the first password called
firstPasswordwhich will have an empty string, we will fill it out with the output once we finish the next step. - Next I created a variable called
pwordLwhich will set the length of the password, I set it equal to the variableiso that the word's length also changes according to the number chosen.
- I created a function called
genFirstPassword()which will generate the first password. - We will use the
forloop to generate a password.Math.random()method will be responsible for creating the random passwords. - Once that's done, link the
firstPasswordInputto thefirstPasswordvariable and tada! it will work, make sure you set a character limits first.
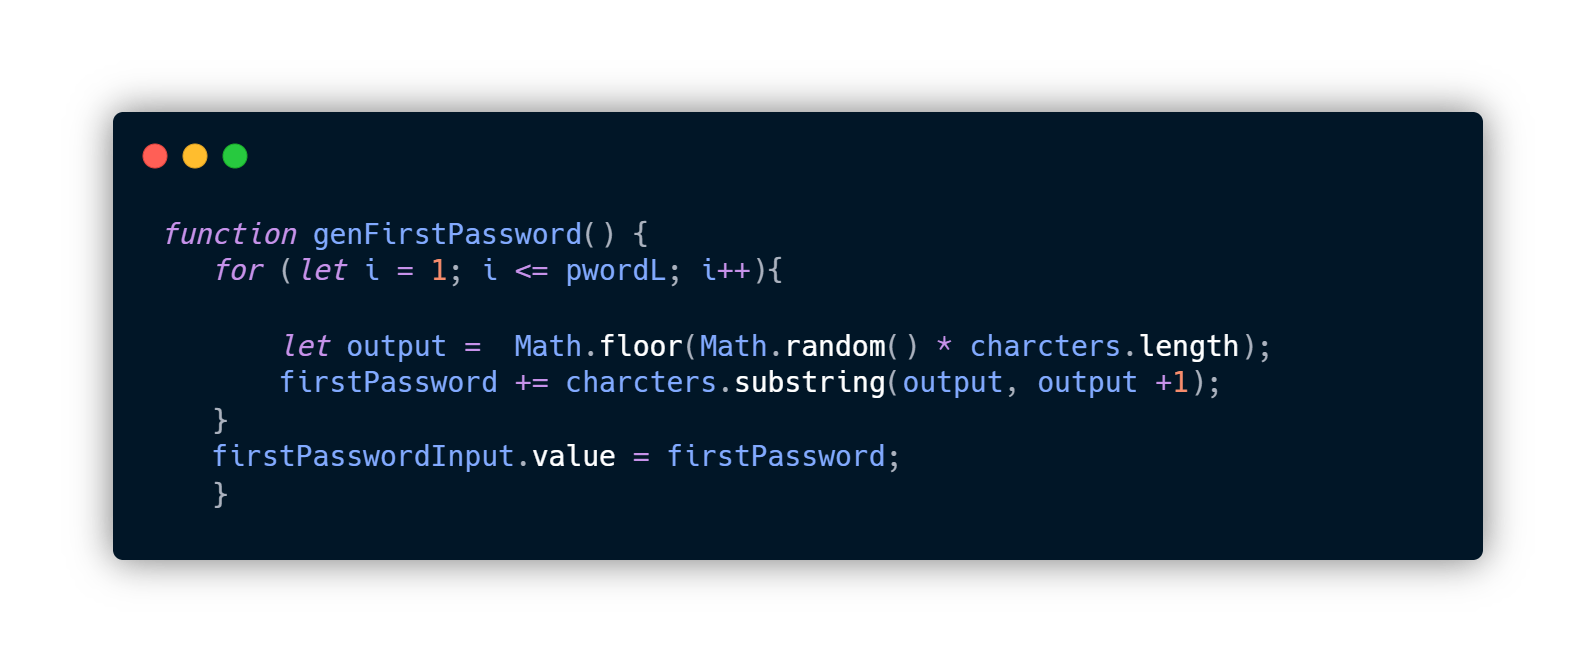
- You can follow the same steps to created the second output, make sure you type second instead of first.
4. Copy Password Feature:
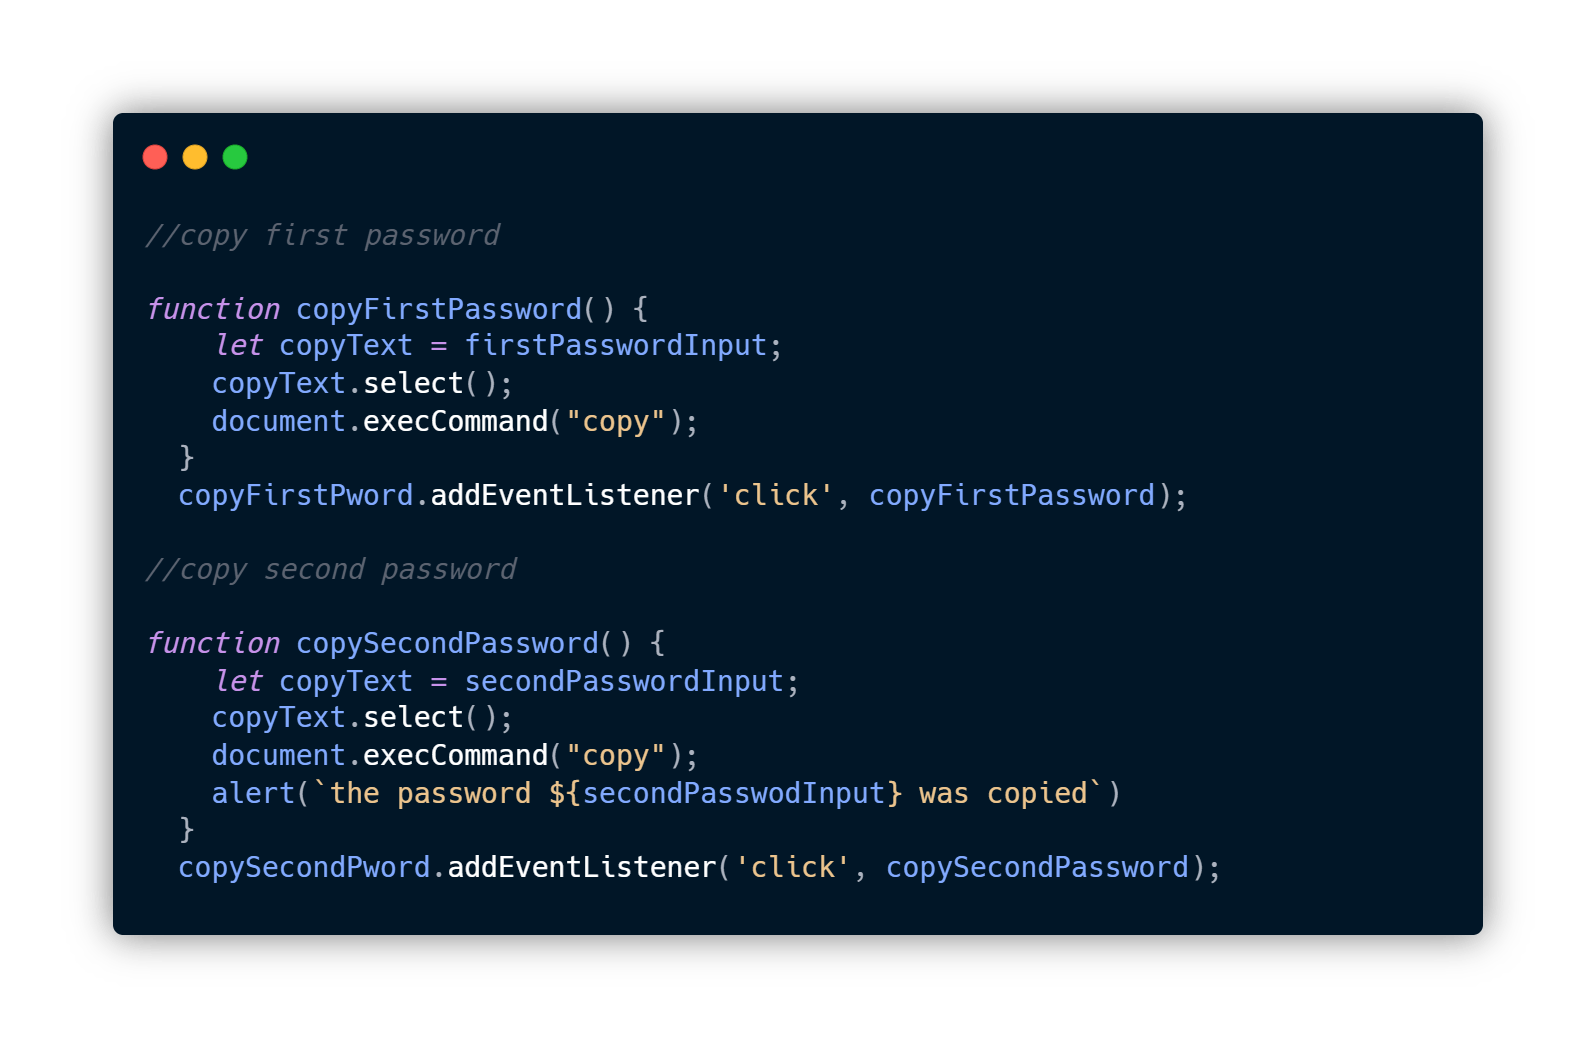
- This step it pretty simple, I created a function for each password output, the following function will select the password and execute the copy command.
- I added a click event listener to the
copyFirstPwordandcopySecondPword, it will execute the function when it's clicked.
Conclusion:
Were're done! once all the steps are done you can generate passwords by setting the characters limit and clicking on the button.
You can also check out the source code and the live preview
ps: If you liked this article, there will be more in the future. Also you can find me on Twitter, I'm currently on my second round of the #100DaysOfCode